MontessoriHelper

Category: Montessori Lessons Age 0 to 3 (Infant)

Montessori Lessons for Infants Age 0 to 3

  • Montessori Opening and closing bottles lesson activity

    Montessori Lessons Album

    AREA

    Practical Life

    AGE

    3 years

    MATERIALS

    Assorted bottles

    DIRECT AIM

    How to open and close bottles with various lids.

    INDIRECT AIM

    Fine motor skills
    Eye hand co-ordination
    Concentration
    Develop strength in fingers
    Dexterity.

    PRESENTATION

    [DAP hasAccessTo=”11,21,22,23″ errMsgTemplate=”LONG”]

    1. Invite the child to begin Work Cycle.
    2. Position the tray at the top of the mat.
    3. Using your dominant hand, remove bottles from the tray arranging them horizontally from left to right.
    4. To open

    5. Screw off lid
    6. Grasp the first bottle on far left-hand side with your left hand bringing it slightly forward to the front of the mat.
    7. With your right hand, pincer grip the fingers over the lid screwing the lid anti-clockwise in quarter turns whilst gently lifting it until lid releases from the bottle.
    8. Place lid in front of the bottle.
    9. To close

    10. Hold the lid in your right hand in a pincer grip, and with the left hand, bring bottle slightly forward.
    11. Bring lid towards bottle holding it against the edge of the neck of the bottle so that the child can see the shape of lid and neck as being the same size.
    12. Lower the lid gently, align thread and turn in quarter turns until lid is secure.
    13. Place on mat.
  • Invite the child to have a turn.
  • End the work cycle.
  • [/DAP]

    CONTROL OF ERROR

    The lids will not fit securely
    Wear and tear of lid

    EXTENSIONS

    Snapper lid i.e. Shampoo bottle

    Fixed screw open and closed lid revealing sprinkling holes i.e. Baby Powder

    VARIATIONS

    Bottles of different size and colour

  • Montessori Unrolling and rolling a floor mat Lesson Activity

    Montessori Lessons Album

    AREA

    Practical Life

    AGE

    2.5 years

    MATERIALS

    Floor mat

    DIRECT AIM

    How to unroll and roll a floor mat.

    INDIRECT AIM

    Concentration
    Gross motor co-ordination
    Visual discrimination
    Respect for peers
    Crossing of mid line (smoothing out mat)

    PRESENTATION

    How to unroll the mat

    1. Invite the child to begin Work Cycle.
    2. Place the rolled up mat in front of your body.
    3. Position your knees on the edge of the rolled mat.
    4. Using the tips of your fingers, gently push the mat away from your body to unroll slightly. With left hand, smooth out left side of mat and with right hand, the right side.
    5. Again, using the tips of the fingers, roll out mat further repeating smoothing process. Repeat until mat fully unrolled.

    How to roll up a mat

    1. Position your body at the end of the mat.
    2. Grasp the mat with the fingers on top of the mat and the thumbs on the underside of the mat and roll your hands to create a roll in the mat.
    3. Continue to roll the mat a few times.
    4. Still holding the mat with your left hand, tap the right hand edge of the roll with the right hand. Exchange hands and tap with the left hand.
    5. Place both hands on the mat and continue rolling. Repeat tapping action with alternate hands. Continue until the mat is entirely rolled.
    6. Swivel the mat around.
    7. Invite the child to have a turn.
    8. End the work cycle.

    CONTROL OF ERROR

    The mat will not fit into the mat stand.

    VARIATIONS

    Rolling mats of different sizes and textures i.e. a rolled serviettte.

  • Montessori Unlocking and locking padlocks Lesson Activity

    Montessori Lessons Album

    AREA

    Practical Life

    AGE

    3 – 4 years

    MATERIALS

    One basket and three sets of different sized padlocks with keys.

    DIRECT AIM

    Unlock and lock padlocks of different sizes.

    INDIRECT AIM

    Fine motor skills
    Eye hand co-ordination
    Concentration
    Develop strength in fingers
    Develop pincer grip
    Visual discrimination
    Dexterity.

    PRESENTATION

    1. Invite the child to begin Work Cycle.
    2. The child places the tray on the mat in front of the adult.
    3. The adult pushes the tray to the top edge of the mat.
    4. With right hand, remove the basket from the tray and place on mat.
    5. With right hand, remove padlocks (individually) from the basket and arrange in order of size from left to right horizontally across the mat.
    6. With a right hand pincer grip, grasp the keys (individually) and place in front of respective padlock.
    7. Using left-hand pincer grip, pick up padlock and turn it so that the child can see the keyhole.
    8. With your right hand, pick up corresponding key in a pincer grip and gently slide into keyhole.
    9. Turn key clockwise until it clicks.
    10. Return key to its place on mat, open padlock arm slightly and return to position on the mat to show it is unlocked.
    11. Continue to do the same with other padlocks.
    12. To close padlock, using left hand index finger and thumb, hold the base of the padlock. With your right index finger and thumb, depress padlock arm so that it clicks into locking position.
    13. Return to padlock to relevant position on mat.
    14. Continue to do the same with other padlocks
    15. Moving from left to right, with right hand pincer grip, replace padlocks in basket.
    16. With right-hand pincer grip, moving from left to right, pick up keys and return to the basket and place the basket on the tray.
    17. Bring tray to the centre of the mat.
    18. Invite the child to have a turn.
    19. End the work cycle.

    CONTROL OF ERROR

    Noise – dropping padlocks and/or key

    Colour coding of padlock and key

    EXTENSIONS

    Unlock a padlock in environment

    Unlock door in environment

    Unlock combination lock i.e. suitcase

    VARIATIONS

    Different sizes of locks and keys.

  • The Montessori Red Rods Lesson Activity

    Montessori LessonMontessori Red Rods Presentation
    The Montessori Red Rods, Pink Tower and Broad Stair are a sequence of materials designed to enable a young child to explore dimension.

    How to present the Montessori Broad Stair Lesson Activity
    How to present the Montessori Pink Tower Lesson Activity

    MONTESSORI RED RODS ACTIVITY:

    The Montessori Red Rods (also known as “Long Rods”) – Montessori Sensorial Lesson Activity for Ages 0 to 6

    MONTESSORI RED RODS OBJECTIVES:

    • To develop the child’s visual and muscular perception of length.
    • To develop the child’s co-ordination of movement.
    • To provide controlled experiences of seriation.
    • To give the child basic language important in Maths.
    • Co-ordination, Balance, Concentration.

    MONTESSORI RED RODS MATERIALS:

    • 10 Red Wooden Rods all the same thickness but varying in length from one decimeter to one meter.
    • Each rod increases in length by the length of the smallest rod. The pieces then stand in the same relation to one another as the natural series of the numbers 1, 2, 3, 4, 5, 6, 7, 8, 9, 10.
    • Work mat.

    [ebayfeedsforwordpress feed=”http://rest.ebay.com/epn/v1/find/item.rss?keyword=Montessori+Red+Rods&sortOrder=BestMatch&programid=1&campaignid=5336664926&toolid=10039&listingType1=All&feedType=rss&lgeo=1″ items=”2″]

    MONTESSORI RED RODS CONTROL OF ERROR:

    • The rods will not be in a stair formation and the child may feel the irregularity.
    • The child may see the irregular pattern.
    • The smallest rod fits into each successive step.

    AGE:

    2 ½ years approx.

    MONTESSORI RED RODS PRESENTATION 1:

    1. Individual exercise done on a floor mat.
    2. Place a floor mat on the working space.
    3. Show the child how to carry each rod to the mat one by one by holding each rod at the top with one hand and at the bottom with the other. This will give the child a muscular impression of length.He should hold the rods upright so that he does not bump into other children.The rods are randomly placed on the mat.
    4. Show the child how to build the rods starting with the shortest rod. Align the rod with the edge of the mat. Using your middle and index finger lightly trace along the entire length of the rod.
    5. Find the next longest rod. Bring it into position next to and above the previous rod and trace along its length again. Proceed with all the rods in this way until the stair is entirely built.
    6. Pause and admire the stair and then mix up the rods and invite the child to try.
    7. Should you see the child struggling, mix the rods up but align the mixed up rods along the edge of the mat.
    8. Once the child has successfully built the stair, show him how to fit the shortest rod into each successive stair.

    Should the child struggle with this exercise or for younger Children from Age 1 to 3 they can do:

    1. The 4 or 5 smallest rods
    2. The 5 largest rods
    3. 5 successive rods from the middle
    4. Use every other rod.
  • Montessori Materials, Fruit Nomenclature Cards, Age 1 to 6

    Montessori Fruit Materials

    Montessori Fruit Printables

    Montessori Materials, Fruit Nomenclature Cards, Age 1 to 6

    Category : Cultural – Botany Downloadable PDF

    [DAP isLoggedIn=”N”]


    Compare Subscription Options.

    [/DAP]

    Size: Each Page is A4 in size and has two nomenclatures per page

    Number of Pages : 10

    Age : 3 to 6

    Instructions for use :

    • Download the Montessori Nomenclature PDF file to your PC and then print it out.
    • Once you have printed the Montessori Nomenclature Cards, then cut them along the perforated lines.
    • For each page you will have cut out one card that has the description included in it and one card without the description.
    • You will also cut out the separate description tag, which is used for sequential matching.
    • To see how to use these Montessori Nomenclature Cards take a look at this Video Tutorial example
  • Montessori Materials, Vegetable Cards, Age 1 to 6

    Montessori Types of Vegetables MaterialsMontessori Types of Vegetables Printables
    Category : Cultural – Botany Downloadable PDF

    [DAP isLoggedIn=”N”]


    Compare Subscription Options.

    [/DAP]

    Size: Each Page is A4 in size and has two nomenclatures per page

    Number of Pages : 10

    Age : 3 to 6

    Instructions for use :

    • Download the Montessori Nomenclature PDF file to your PC and then print it out.
    • Once you have printed the Montessori Nomenclature Cards, then cut them along the perforated lines.
    • For each page you will have cut out one card that has the description included in it and one card without the description.
    • You will also cut out the separate description tag, which is used for sequential matching.
    • To see how to use these Montessori Nomenclature Cards take a look at this Video Tutorial example
  • How to learn your ABC the Montessori way

    Montessori Helper

    It is a well known fact that the vast majority of children learn the alphabet by rote.  

    In other words they simply repeat the letters and learn them by repetition.

    The ABC song is probably the best example of this misguided conventional wisdom. 

    The same applies to how most children learn the numbers 1 – 10.

    Since the alphabet and the number system are the most fundamental building blocks to all future language and mathematical learning in a child’s life… why is it that we do not allow the child to learn it in a way that aids comprehension, not just memorisation by repetition.

    The video clip above is a simple example of how concepts of number are literally represented in Montessori by concrete objects like the “red rods”

    In a “concrete” way where they will literally understand the difference between “1” and “2”, or “a” and “b”. 

    Think about it, how is a child meant to comprehend what “2” actually means when all they have heard is someone say “2” and they have simply repeated it, much to the satisfaction of the doting parent or teacher.  It is this very logic that is often the catalyst for “blocks” and learning difficulties with Maths and other subject areas in later years.

    By contrast, one of the benefits of using the Montessori Method, for teaching the alphabet and numbers, is because she stresses how important it is to “internalise” a concrete concept first before building on that. 

    As a foundation for writing and arithmetic a child needs to learn from concrete “sensory” experiences through the sensorial and practical life lesson activities.

    Through Sensorial activities which create this foundation a child can begin to learn the process of reading and writing (using the phonetic or “sounded” alphabet) and the process of counting starting the sandpaper letters and the large number rods

    Once these processes are established via the Montessori Method, the child is then open to an unlimited field for future development.

    The video clip above is a simple example of word formation using the sandpaper letters and the phonetic alphabet.

    What the Montessori Method does therefore is to introduce the child to “abstract” concepts through the a process of “concrete” cognition

    By contrast, in traditional methods (conventional wisdom) we attempt to teach abstract concepts not yet grounded by relevant concrete experiences, and these “concrete” experiences and the progression of them into the “abstract” are an absolutely vital foundation to enable a child to progress to abstract learning in the first instance. 

    With the advent of abstract tools like computers, laptops, tablets and smartphones, the potential for “premature abstraction” is much higher than before and so we need to be especially careful when using apps and interactive tools.   Not to say that all modern aids like these are inherently evil, but it is important to understand the principles of the Montessori Method first before incorporating these tools into learning.

    Similar to building a sturdy house, by applying the Montessori Method in Maths, we establish a firm foundation at a concrete level first, to prevent the house from being structurally weak over time, even if the house appears all in order from the outside.

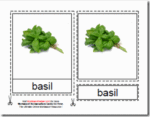
  • Montessori Herbs Materials, Age 3 to 6

    image Montessori Herb Cards

    Category : Cultural – Botany Downloadable PDF

    [DAP isLoggedIn=”N”]


    Compare Subscription Options.

    [/DAP]

    Size: Each Page is A4 in size and has two nomenclatures per page

    Number of Pages : 10

    Age : 3 to 6

    Instructions for use :

    • Download the Montessori Nomenclature PDF file to your PC and then print it out.
    • Once you have printed the Montessori Nomenclature Cards, then cut them along the perforated lines.
    • For each page you will have cut out one card that has the description included in it and one card without the description.
    • You will also cut out the separate description tag, which is used for sequential matching.
    • To see how to use these Montessori Nomenclature Cards take a look at this Video Tutorial example
  • The Montessori Loop Beading Lesson Activity for Infants Age 8 Months to 3 Years

    NAME OF MONTESSORI ACTIVITY

    The Montessori Loop Beading Activity for Infants

    AREA

    Sensorial

    AGE

    1 – 3 Years

    MATERIALS

    Loop Shaped Breakfast Cereal (or pasta)

    Cheerios

    Work Mat.


    Wooden Skewer Sticks with Blunt Ends

    DIRECT AIM

    Developing Fine Motor Skills

    INDIRECT AIM

    Fine motor co-ordination, control of movements, concentration.

    PRESENTATION

    1. Assist the infant to fetch a work mat and place it on the floor.
    2. Assist the infant to fetch the activity tray from the Montessori Cabinet
    3. Sit on opposite side of the mat to the infant
    4. Remove a handful of cereal from the box and place it in a small bowl on the matt next to the infant.
    5. Hold up a skewer stick in the infant’s natural line of vision and pause momentarily when you have the child’s attention, then place a single loop onto the stick.
    6. Now hold the skewer in front of the infant and allow them to follow your example. [DAP hasAccessTo=”11,21,22,23″ errMsgTemplate=”LONG”]
    7. As the infant improves in confidence place the skewer stick and the bowl of cereal on the work mat in front of the infant so that he can do it unassisted.
    8. When the infant has ceased to be interested in the activity, assist the infant to place the activity tray back in the Montessori Cabinet
    9. As the infant progresses over time with this activity, you can assist less and less and eventually he will be able to perform all the tasks above unassisted.
    10. [/DAP]

    CONTROL OF ERROR

    The loop does not go onto the Skewer

    EXTENSIONS


    VARIATIONS

     
  • The Montessori Small Stick Posting Lesson Activity for Infants Age 1 to 3 Years

    [/DAP]

    NAME OF MONTESSORI ACTIVITY The Montessori Small Stick Posting Activity for Infants
    AREA Sensorial
    AGE 1 – 3 Years
    MATERIALS Wooden Craft Match Sticks

    Work Mat.


    Large Glass Salt Shaker
    [DAP hasAccessTo=”11,21,22,23″ errMsgTemplate=”LONG”]


    DIRECT AIM Developing Motor Skills
    INDIRECT AIM Gross motor co-ordination, control of movements, concentration.
    PRESENTATION
    1. Assist the infant to fetch a work mat and place it on the floor.
    2. Assist the infant to fetch the activity tray from the Montessori Cabinet
    3. Sit on opposite side of the mat to the infant
    4. Remove all the craft match sticks from the salt shaker and place them on the mat next to it.
    5. Hold up the salt shaker in the infant’s natural line of vision and pause momentarily when you have the child’s attention, then place (“post”) a single craft match stick into the bottle.
    6. Now hold the bottle in front of the infant and give them a craft match stick so that they can place it in the salt shaker
    7. As the infant improves in confidence place the salt shaker on the work mat in front of the infant so that he can do it unassisted.
    8. When the infant has ceased to be interested in the activity, assist the infant to place the activity tray back in the Montessori Cabinet
    9. As the infant progresses over time with this activity, you can assist less and less and eventually he will be able to perform all the tasks above unassisted.
    CONTROL OF ERROR The stick does not go into the bottle
    EXTENSIONS
    VARIATIONS
  • The Montessori Large Stick Posting Lesson Activity for Infants Age 1 to 3 Years

    NAME OF MONTESSORI ACTIVITY

    The Montessori Large Stick Posting Activity for Infants

    AREA

    Sensorial

    AGE

    1 – 3 Years

    MATERIALS

    Wooden Craft Sticks

    Work Mat.

    Wicker Basket.

    Glass Vinegar Bottle


    DIRECT AIM

    Developing Motor Skills

    INDIRECT AIM

    Gross motor co-ordination, control of movements, concentration.

    PRESENTATION

    1. Assist the infant to fetch a work mat and place it on the floor. [DAP hasAccessTo=”11,21,22,23″ errMsgTemplate=”LONG”]
    2. Assist infant to fetch the activity tray from the Montessori Cabinet
    3. Sit on opposite side of the mat to the infant
    4. Remove all the craft sticks from the bottle and place them on the mat next to the bottle.
    5. Hold up the bottle in the infant’s natural line of vision and pause momentarily when you have the child’s attention, then place (“post”) a single craft stick in the bottle.
    6. Now hold the bottle in front of the infant and give them a craft stick so that they can place it in the bottle
    7. As the infant improves in confidence place the bottle on the work mat in front of the infant so that he can do it unassisted.
    8. When the infant has ceased to be interested in the activity, assist the infant to place the activity tray back in the Montessori Cabinet [/DAP]
    9. As the infant progresses over time with this activity, you can assist less and less and eventually he will be able to perform all the tasks above unassisted.

    CONTROL OF ERROR

    The stick does not go into the bottle

    EXTENSIONS


    VARIATIONS

     
  • The Montessori Token Posting Lesson Activity for Infants Age 1 to 3 Years

    NAME OF MONTESSORI ACTIVITY

    The Montessori Token Posting Activity for Infants

    AREA

    Sensorial

    AGE

    1 – 3 Years

    MATERIALS

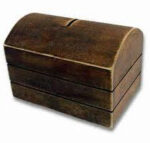
    Large Wooden Coin Box (The box needs to be one that can be opened to retrieve it’s contents)

    Work Mat.

    DIRECT AIM

    Developing Motor Skills

    INDIRECT AIM

    Gross motor co-ordination, control of movements, concentration, memory.

    PRESENTATION

    1. Assist the infant to fetch a work mat and place it on the floor.
    2. Assist the infant to fetch the activity tray from the Montessori Cabinet
    3. Sit on opposite side of the mat to the infant
    4. Remove all the wooden tokens from the coin box and place them on the mat next to it. [DAP hasAccessTo=”11,21,22,23″ errMsgTemplate=”LONG”]
    5. Hold up the coin box in the infant’s natural line of vision and pause momentarily when you have the child’s attention, then place (“post”) a single token into the coin box.
    6. Now hold the coin box in front of the infant and give them a token so that they can place it in the coin box
    7. As the infant improves in confidence place the coin box on the work mat in front of the infant so that he can do it unassisted.
    8. When the infant has ceased to be interested in the activity, assist the infant to place the activity tray back in the Montessori Cabinet
    9. As the infant progresses over time with this activity, you can assist less and less and [/DAP]eventually he will be able to perform all the tasks above unassisted.

    CONTROL OF ERROR

    The tokens do not go into the coin box

    EXTENSIONS


    VARIATIONS

     
  • The Montessori Drinking Water From a Cup Lesson Activity for Infants Age 1 to 3 Years

    Montessori Lesson

    NAME OF MONTESSORI ACTIVITY The Montessori Drinking Water From a Cup Activity for Infants
    AREA Practical Life
    AGE 1 – 3 Years
    MATERIALS Strong Small Glass Cup

    Strong Small Glass Jug

    Work mat.

    DIRECT AIM Developing Practical Life Skills
    INDIRECT AIM Fine motor co-ordination, control of movements, concentration, confidence.
    PRESENTATION
    1. Prepare the activity tray in advance by half filling the small jug with water.
    2. Assist the infant to fetch a work matt and place it on the floor.
    3. Assist the infant to fetch the activity tray from the Montessori Cabinet
    4. Sit on opposite side of the matt to the infant [DAP hasAccessTo=”11″ errMsgTemplate=”LONG”]
    5. Lift the jug and hold it up in the infant’s natural line of vision and pause momentarily when you have the child’s attention, then pour the water into the small glass cup.
    6. Now hold the rim of the cup to the infants mouth and slowly tilt it so that he can drink the water.
    7. If the infant grasps the cup, release your grasp slowly and allow the infant to continue to drink the water.
    8. As the infant improves in confidence place the coin box on the work matt in front of the infant so that he can do it unassisted.
    9. When the infant has ceased to be interested in the activity, assist the infant to place the activity tray back in the Montessori Cabinet
    10. As the infant progresses over time with this activity, you can assist less and less and eventually he will be able to perform all the tasks above unassisted.
    CONTROL OF ERROR [/DAP]The water does not go into the cup.

    {

    The infant spills the water when drinking

    EXTENSIONS
    VARIATIONS
  • The Household Items (Treasure) Basket


    NAME OF MONTESSORI ACTIVITY

    The Montessori Treasure Basket Activity for Infants

    AREA Language
    AGE 6 Months – 18 Months
    MATERIALS TreasureBasket

    Wicker Basket containing some household items such as a Whisk, Tennis Ball, Nail Brush, Scourer, Sponge, a small bottle, a spoon.

    You can use just about any household item that is safe, and you can also rotate the items from time to time.

    picture of the materials


    DIRECT AIM Developing Vocabulary
    INDIRECT AIM Gross motor co-ordination, control of movements, concentration.
    PRESENTATION
    1. When the infant is facing you place the Work Mat between you and the child and place the basket on the Mat.
    2. Remove an Object from the Basket, placing it on the mat and putting the basket aside.
    3. Show the object to the child by holding it in their natural line of vision and pause momentarily when you have the child’s attention, then clearly articulate the name of the object to the child in a normal fashion

        (without using “baby-talk”)…for example. “Whisk”.

      1. [DAP hasAccessTo=”11,21,22,23″ errMsgTemplate=”LONG”]

      2. When you have completed naming of the object, simply return the object to the basket, and return the basket and mat to your Montessori Shelf or any Cabinet you could use for this purpose.
      3. You can start with one or two items in the basket and add more as you progress, you should be able to gauge this from the child.
      4. You should not work with more than 2 to 3 objects [/DAP]within any single presentation.

      [/DAP]

      CONTROL OF ERROR None Required
      EXTENSIONS
      VARIATIONS
    4. Montessori Sandpaper Numbers Lesson Activity

      Montessori Lesson

      MONTESSORI MATERIALS:

      Montessori Sandpaper Numbers w/ Box
      Ten sandpaper numerals 0-9 mounted on green board and presented in a wooden box.To teach the child the written symbol for numbers 1 – 10.
      The numbers from one to ten in sandpaper mounted on green card.

      MONTESSORI OBJECTIVES:

      To teach the child the numerals from one to ten.

      To prepare the child for writing.

      CONTROL OF ERROR:

      The control of error is tactile.

      If the child’s finger moves off the sandpaper the difference in texture will be easily noticed.

      AGE:

      3 ½ years approximately.

      PRESENTATION 1:

        [DAP hasAccessTo=”11,21,22,23″ errMsgTemplate=”LONG”]

      1. Begin the work cycle.
      2. Ask the child to sensitise his fingers or to wash his hands in tepid water
      3. The child sits on your non-dominant side.
      4. The child carries the numbers to the table. Show him to remove the first three carefully from the box without scraping them.
      5. Feel the first number with a light, continuous movement with the middle and index fingers of your right hand, holding the board steady with your left hand.
      6. Proceed with a three period lesson remembering to carefully isolate the numbers in the first and third period.
      7. Each time a symbol is identified in any stage, it should be felt and then named by the child.

      PRESENTATION 2:

      1. Always remember to present one known and two unknown number symbols at a time.
      2. Always revise the previous numbers and then introduce the new numbers.

      NOTE:

      In tracing the sandpaper numbers, three of the senses are involved:

      Tactile – feeling the number

      Visual – seeing the number

      Auditory – hearing the number

      The child only starts to write the number when he has had a lot of practise with the tracing.

      EXTENSION 1:

      1. Let the child trace the numbers in a container with flour or fine sand in it. (A high lipped baking tray works well)
      2. The child traces the sandpaper number and then traces the number into the mealie meal or sand, or into the air or even on the surface of the table.
      3. Show the child how to shake the container to smooth out the sand.
      4. Remember; do not correct the child.

      EXTENSION 2:

      1. Allow the child to make a RAINBOW number by tracing around a single number a few times using different coloured crayons.
      2. The child must trace the number in the correct direction, preferably not lifting his pencil unless the number calls for that.

      EXTENSION 3:

      1. The child can write in the booklet that the Montessori Directress has made for the child.
      2. The can be a cover saying, “My 5 book By…”
      3. Or “My 10 book By …”

      EXTENSION 4:

      1. Blindfold the child or place the numbers under a cloth and allow the child to feel the numbers and to try to guess which number it is that they can feel.
      2. Alternatively, the Montessori Directress can ask the child to feel for a specific number.
      [/DAP]