MontessoriHelper

Category: Sensorial

Download Montessori Sensorial PDF Materials for Ages 3 to 6 in an Instant !

  • Montessori Metal Insets Lesson Activity

    Montessori Lesson

    AGE

    4.5 to 5 years

    MATERIALS

    Two sloping boards, each containing 5 metal frames and insets.
    Square, rectangle, trapezium, triangle, pentagon.
    Circle, oval, ellipse, quatrefoil, curvilinear triangle.
    White squared paper the same size as the outer frame.
    A selection of coloured pencils and their holders.
    A smooth mat or tile for “pressing on.”

    DIRECT AIM

    To help the child’s proficiency in the use of a pencil.

    INDIRECT AIM

    To cultivate lightness of touch, control of line, familiarity with the curves and lines found in letters.
    To work in an anti-clockwise direction in preparation for writing.
    Fine motor control, precision and concentration.
    To develop the chromatic sense and encourage creativity.

    PRESENTATION 1

    1. Invite the child to get a work mat or work board.
    2. Name the material and show where it is kept.
    3. Invite the child to take the tile, 2 pieces of paper, 3 coloured pencils, a frame (rectangle) and its inset, to the table.
    4. Show the child how to hold the pencil in his dominant hand in a pincer grip, and how to hold the frame steady with his other hand. He places his left hand on the left-hand side of the frame.
    5. The child needs to sit in a comfortable position with his back upright in the chair and both feet on the ground.
    6. Place the outer frame on the paper, ensuring that the paper coincides exactly with the edges of the paper.
    7. Select a coloured pencil. Hold the frame steady and trace carefully around the interior edge of the frame in one continuous, anti-clockwise movement.
    8. Remove the frame and place it on the table on the mat.
    9. Select a different coloured pencil.
    10. From the left-hand edge of the drawn frame, draw continuous, tight lines from left to right.
    11. Fill the figure entirely with the tight, parallel lines.
    12. Observe the result with the child. Invite the child to use the other piece of paper to repeat the process.
    13. Show the child how to store his finished work in his work folder.
    14. It is advisable to place a date stamp on the back of the child’s work and his name if he is unable to write it himself.

    PRESENTATION 2

    1. The child does the activity as in the exercise above.
    2. Show the child how to trace the frame and then how to turn the frame and trace around that too.
    3. The 2 shapes are then superimposed upon one another to form 2 shapes.
    4. Select different coloured pencils.
    5. From the left-hand edge of the drawn frame, draw continuous, tight lines from left to right. The Montessori Directress can also show the child how to draw zigzags from left to right, top to bottom.
    6. Fill the figures entirely with the tight, lines

    PRESENTATION 3

    1. The child does the activity as in the exercise above.
    2. Show the child how to trace the frame and its matching inset.
    3. The 2 shapes are then superimposed upon one another to form a shape with two similar lines, the one line just slightly smaller than the other.
    4. Again, from the left-hand edge of the drawn frame, draw continuous, tight lines from left to right. The Montessori Directress can also show the child how to draw zigzags from left to right, top to bottom.
    5. Fill the figure entirely with the tight lines.

    PRESENTATION 4

    1. The child does the activity as in the exercise above.
    2. Show the child how to trace the frame and another shaped frame. (Rectangular frame and the oval frame for example.)
    3. The 2 shapes are then superimposed upon one another to form an interesting shape with two different lines.
    4. Again, from the left-hand edge of the drawn frame, draw continuous, tight lines from left to right. The Montessori Directress can also show the child how to draw zigzags from left to right, top to bottom.
    5. Fill the figures entirely with the tight, continuous lines.

    PRESENTATION 5

    1. The child does the activity as in the exercise above.
    2. Show the child how to trace any two shaped insets.
    3. The Montessori Directress shows the child how to fill in the whole piece of inset paper.
    4. Again, from the left-hand edge of the drawn frame, draw continuous, tight lines from left to right.
    5. The Montessori Directress can also show the child how to draw zigzags from left to right, top to bottom as well as from top of the paper to the bottom of the piece of paper, working from left to right.
    6. Fill the figures entirely with the tight lines

    PRESENTATION 6

    1. The child does the activity as in the exercise above but this time the child may want to use a slightly bigger piece of paper ( half A4 size perhaps).
    2. Show the child how to trace any two shaped insets.
    3. The Montessori Directress shows the child how to fill in the whole piece of paper.
    4. Again, from the left-hand edge of the drawn frame, draw continuous, tight lines from left to right. The Montessori Directress can also show the child how to draw zigzags from left to right, top to bottom as well as from top to bottom, working from left to right.
    5. Fill the figures entirely with the tight, lines

    PRESENTATION 7

    1. The child does the activity as in the exercise above but this time the child may want to use a slightly bigger piece of paper (half A4 size or A4 size, perhaps).
    2. Show the child how to trace any shaped insets and how to create a border design to decorate his work.
    3. Again, from the child may want to fill in the spaces with various zigzags.

    PRESENTATION 8

    1. The child does the activity as in the exercise above but this time the child may want to use a slightly bigger piece of paper (half A4 size or A4 size, perhaps).
    2. Show the child how to trace any shaped insets and then how to draw lines that have been graded either from darkest to lightest or the opposite direction, with different shades of the same coloured pencil crayon.
    3. Again, from the child may want to fill in the spaces with various zigzags.
    4. The child can name the different shades.
  • Montessori Mystery Bags Lesson Activity

    Montessori Lesson

    AGE

    2.5 to 3 years approx.

    MATERIALS

    Mystery bags A, B, C.
    Solid objects, e.g. cubes, cylinders and spheres – several of each.
    A bag and a felt mat.
    Set of objects similar in shape but different in size, e.g. buttons. There should be several of each size and a few small dishes.
    Set of objects, different in size and shape, e.g. pasta, small beads, dried peas or beans. There should be several of each shape and size and a few small dishes
    A bag containing a collection of small familiar objects, e.g. teaspoon, cotton reel, large button, ring, marble, and coin. (Vary the contents of the bag from time to time as this exercise is very popular with young children)

    DIRECT AIM

    To educate the stereognostic sense

    INDIRECT AIM

    Language development
    Ex. 1 prepares the child directly for geometry.

    PRESENTATION 1

    1. Place the felt mat on the table.
    2. Remove the solids one by one feeling each solid.
    3. Invite the child to feel the solids.
    4. Replace them in the bag, find for example a cube, and place it on the mat.
    5. Then find another cube in the bag and place it beside the first cube so that the child can see the objective of the exercise.
    6. Invite the child to find a matching pair from the bag.

    PRESENTATION 2

    The Montessori Directress presents the dish containing the objects from Set 2, i.e. buttons. Show the child how to feel and sort the objects into the small dishes. When the child understands the exercise, ask him to do it with his eyes closed.

    Game 1

    This is a game. The Montessori Directress sits at the table and the children sit in a circle around her.
    The Montessori Directress empties the bag on the table and the children see the contents. Then she puts the contents back into the bag and invites the children one at a time, to come and close their eyes, put their hands into the bag, pick any object and name it, before removing it from the bag. The child must say what the object is by feeling it and not seeing it.

    Game 2

    Vary the objects in the bag and play the game without showing the children the contents beforehand.

    CONTROL OF ERROR

    Visual, the paired objects should all look the same.

  • Montessori Sandpaper Letters

    ACTIVITY : Sandpaper Sounds / Letters

    MATERIALS:

    A set of square cardboards containing the sounds or the shapes of the letters of the alphabet in sandpaper.
    The letters are written in lowercase.

    Montessori Sandpaper Letters Lower Case

    Montessori Sandpaper Letters Lower Case

    5 of the cards are blue card, representing the vowels.
    The remainders of the letters are on pink card.
    A table mat.

    OBJECTIVES:

    To help the child recognize the shape of the letters and the sounds they make.

    CONTROL OF ERROR:

    The roughness and smoothness of the sandpaper. The letter may be placed towards the right hand side of the card so that the child has a space to hold the card with his left hand.

    AGE:3 ½ – 4 years approx.

    PRESENTATION:

    [DAP hasAccessTo=”2,11,21,22,23″ errMsgTemplate=”LONG”]

    1. Invite the child to get a work mat. The child sits on your non-dominant side. If the child is left handed, accommodate him by sitting on his dominant side and tracing the letter with your left hand.
    2. Sensitise the fingers and invite the child to do so.
    3. The Montessori Directress selects 3 letters, preferably 3 from the child’s name. The sounds should look and sound very different.
    4. Leave the sounds face down at the top right hand side of the table.
    5. Choose one of the letters.
    6. Place it face up in front of the child.
    7. With the index and middle fingers trace over the sandpaper symbol, the way that it should be written.
    8. Sound it out saying, “This is f”. the sound should be traced in one smooth, continuous movement.
    9. Repeat tracing the letter again, and then repeat the sound.
    10. Invite the child to trace and to sound out the letter.
    11. The Montessori Directress then turns the card over at the top of the table again, and repeats the procedure with the next sound and then the next. Remember to always isolate the letters in the first period.
    12. In the second period, the Montessori Directress places all 3 letters and the mat and points to a card and asks, “Show me the f” and so on.
    13. Repeat the second period as often as possible
    14. In the third period the Montessori Directress again turns the cards face down, but places one face up, in front of the child and asks, “which sound is this?”
    15. Repeat the procedure with all 3 cards remembering to isolate the cards in the third period.

    FURTHER EXERCISE 1:

    1. Ask the child if he would like to trace the letters in a sensorial medium such as a tray of flour.
    2. The child copies the letters.
    3. At this point there is no need to correct the child.

    FURTHER EXERCISE 2:

    1. Ask the child if he knows any words that start with the letters that you have just traced. E.g. ”Do you know an animal that swims under the water that begins with the sound f?”
    2. “Can you think of a word that begins with f?” and so on with all 3 letters.

    FURTHER EXERCISE 3:

    1. The child can form his letter out of playdough or clay.
    2. Alternatively, he can sew around the shape of the letter. The shape will have been made by the Montessori Directress and cut out of cardboard.
    3. The child can make the letters in a medium of finger-paint having great fun as he does so.
    [/DAP]

  • Montessori Trinomial Cube Presentation

    Montessori Trinomial Cube Presentation

    AGE

    4 –5 years approx.

    MATERIALS

    The trinomial cube is a wooden box with a cover and two adjacent hinged sides, containing 27 wooden blocks that fit together to form a cube with the same pattern on each side and in the middle. The cube has a visual representation of the algebraic formula (a+b+ c) (a+b+c) (a+b+c) or (a+b+c) 3
    3 control charts

    DIRECT AIM

    To help develop the child’s visual perception of three-dimensional patterns.

    INDIRECT AIM

    To prepare the child for later work in Maths, especially algebra
    To aid the child’s fine motor
    Eye- hand co-ordination
    Concentration
    To prepare the child for writing.

    PRESENTATION

    Individual exercise done at a table on a work mat.

    1. Show the child how to carry the box and how to open and remove the box’s lid. Show the child how to lower the two adjacent hinged sides gently towards yourself.
    2. Show the child how to place the lid into the angle made by the opened sides, with the red square in the corner next to the box.
    3. Place the control charts beside and slightly in front of the box.
    4. Remove the top layer of cubes and place them on the furthest (a) control charts that you have placed in front of the cube. Place your flat hand on the cubes to ensure that they are all the same height.
    5. Repeat this removal for the next layer placing them on the control chart closer to you (b) again feeling that they are all the same height.
    6. Repeat this removal for the last layer, placing them on the control chart closest to you (c) again feeling that they are all the same height.
    7. Beginning with the red cube, that is, the cubes on control chart (c) place the SHORTER dimension cubes back onto the lid of the box. Feel that they are all the same height.
    8. Now place the TALLER cubes, on control chart (b) back onto the layer of cubes that are already on the lid of the box. Feel that they are all the same height with the flat of your hand.
    9. Now place the TALLEST cubes, on control chart (c) back onto the layer of cubes that are already on the lid of the box. Feel that they are all the same height with the flat of your hand.
    10. Beginning with the red cube from the top layer of cubes, replace them into the box wrapping the other cubes around the red cube. Place the blue cube in last. Feel with your flat hand that they are all the same height. Do the same for the second layer of cubes and for the third layer of cubes.
    11. Once the cubes are all back, fold up the sides of the box and draw attention to the fact that the pattern of the cubes inside the box resembles the pattern on the lid.
    12. Invite the child to have a turn.

    EXTENSION 1

    The child can build the Trinomial cube in exactly the same way but outside the box without the control charts.

    EXTENSION 2

    One day, after the cube is built outside the box, show the child that all the cube’s faces have the same pattern on them. Turn the cube around to show the child that the back faces are the same too. Place both hands around the cube and lift it, to show the child that the bottom also has the same pattern on it.
    Show the child that the 12 inside faces have the same pattern. You will be able to do this by splitting the cube three ways, horizontally, vertically, and back to front. This will expose each face with each split.

    EXTENSION 3

    Show the child how you can match all the faces of the cubes together. Build a horizontal line on the mat from left to right, matching all the same sized blue faces.
    Do the same with the red, black and yellow faces
    Invite the child to have a turn.

    EXTENSION 4

    The child can independently build the three separate layers of the Trinomial Cube and put them together to make the complete cube, although the child should put them together piece by piece, rather than trying to lift each layer in its entirety.

    CONTROL OF ERROR

    The control charts
    The child feels that all the blocks have the same dimension.
    The colours of the cubes.

  • Montessori Binomial Cube Presentation

    AGE

    4 years approx.
    Montessori Lesson

    MATERIALS

    The binomial cube is a wooden box with a cover and two adjacent hinged sides, containing 8 wooden blocks that fit together to form a cube with the same pattern on each side and in the middle. The cube has a visual representation of the algebraic formula (a+b) (a+b) (a+b) or (a+b) 3
    Control charts

    DIRECT AIM

    To help develop the child’s visual perception of three-dimensional patterns.

    INDIRECT AIM

    To prepare the child for later work in Maths, especially algebra.
    To aid the child’s fine motor.
    Eye- hand co-ordination.
    Concentration.
    To prepare the child for writing.

    PRESENTATION

    1. Individual exercise done at a table on a work mat.
    2. Show the child how to carry the box and how to open and remove the box’s lid. Show the child how to lower the two adjacent hinged sides gently towards yourself. Show the child how to place the lid into the angle made by the opened sides, with the red square in the corner next to the box.
    3. Place the control charts beside and slightly in front of the box.
    4. Remove the top layer of blocks and place them onto the lid, starting with the cube nearest the open side. Then remove the one to the left of that then the one to the right of that. Place them on the appropriate colour of the control lid. Feel that they are all the same height by placing your hand gently onto the layer of cubes.
    5. Place the next layer of cubes directly on top of the previous layer.
    6. Now, remove the top layer of cubes and place it on the furthest (a) control charts that you have placed in front of the cube. Place your flat hand on the cubes again to make sure that they are all the same height.
    7. Repeat this removal for the next layer placing them on the control chart closer to you (b) again feeling that they are all the same height.
    8. Beginning with the red cube, that is, the cubes on control chart (b) place the SHORTER dimension cubes back onto the lid of the box. Feel that they are all the same height.
    9. Now place the TALLER cubes, on control chart (a) back onto the layer of cubes that are already on the lid of the box.
    10. Beginning with the red cube from the top layer of cubes, replace them into the box wrapping the other cubes around the red cube. Place the blue cube in last. Feel with your flat hand that they are all the same height. Do the same for the second layer of cubes.
    11. Once the cubes are all back, fold up the sides of the box and draw attention to the fact that the pattern of the cubes inside the box resembles the pattern on the lid.
    12. Invite the child to have a turn.

    EXTENSION 1

    The child can build the Binomial cube in exactly the same way but outside the box without the control 2harts.

    EXTENSION 2

    1. One day, after the cube is built outside the box, show the child that all the cube’s faces have the same pattern on them. Turn the cube around to show the child that the back faces are the same too. Place both hands around the cube and lift it, to show the child that the bottom also has the same pattern on it.
    2. Show the child that the 6 inside faces have the same pattern. You will be able to do this by splitting the cube three ways, horizontally, vertically, and back to front. This will expose each face with each split.

    CONTROL OF ERROR

    The control charts
    The child feels that all the blocks have the same dimension.
    The colours of the cubes.

  • Montessori Baric Tablets Presentation

    Montessori Lesson

    AGE

    3 years approx.

    MATERIALS

    3 sets of 3 identical wooden tablets. Each set of tablets is made from a different kind of wood, so that the tablets in one set weigh about 9 grams, the next set weighs about 18 grams and the last set weighs about 27 grams. All the tablets are exactly the same size and shape.

    DIRECT AIM

    To help awaken and refine the child’s baric sense.

    INDIRECT AIM

    To aid the child’s fine motor by cultivating a lightness of touch.
    To prepare the child for writing.
    Concentration
    Discrimination and judgement.

    PRESENTATION 1

    [DAP hasAccessTo=”11,21,22,23,319″ errMsgTemplate=”LONG”]
    Individual exercise done at a table.

    1. Remove the Baric Tablets from the lightest set and place them on the mat.
    2. Remove the heaviest set and place these beside the first set.
    3. Show the child how to balance the tablets, one from each set, onto the tips of your fingers, which are facing upwards. Your arms should be relaxed and your thumbs free. Avert your eyes, gently and slightly lift, and then relax your arms in order to get a feel of the relative weights of the baric tablets. Allow the child to feel the differences in weight, either by placing them on the child’s hands for him, or by the child picking them up off the table.
    4. Now, sit opposite the child asking him to avert his eyes. Place a tablet from either category and ask the child to feel and say which is the heavier one and which the lighter one.
    5. Form a pile with the lighter tablets on the left side and the heavier tablets on the right hand side.
    6. The child then does the exercise with the tablets spread out on the table. He picks up two tablets without looking and feels whether they are the same or different. He may loudly identify each one as being either heavy or light and put it into its pile.
    7. When all the tablets have been sorted, the child looks at the pile again to see that he has in fact categorised them correctly.
    8. Again, mix up the tablets on the table and invite the child to do the exercise on his own.

    PRESENTATION 2

    The child can wear a blindfold to do the exercise. This time he can only verify his success at the very end of the activity. That is, he takes the blindfold off at the end and checks his success.

    PRESENTATION 3

    The same as exercise 1 but the child uses the light (9g) and medium (18g) tablets together.

    PRESENTATION 4

    The same as exercise 1 but the child sorts the medium (18g) tablets from the heavy tablets (27g)

    PRESENTATION 5

    The child puts all three tablets out – one from each category. These tablets will serve as a reference. Only one tablet is selected from the mixed up category and it is compared to each of the “reference” tablets on the table.
    When two tablets feel the same, the randomly selected tablet is put behind the reference tablet.
    The child checks his work at the end.

    PRESENTATION 6

    Give a three period lesson on the comparatives and superlatives of heavy, heavier, heaviest or light and lightest or simply heavy and light.[/DAP]

    CONTROL OF ERROR

    The tablets from the different categories look slightly different as the woods look different.

  • Montessori Touch Fabrics Presentation

    Montessori Lesson

    AGE

    2.5 years approx.

    MATERIALS

    Each touch fabric is about 10cm by 10 cm. There are 6 identical pairs of different fabrics.
    Some fabrics may include: linen velvet, tweed, ribbed corduroy, cotton flannel.

    DIRECT AIM

    To help awaken and refine the child’s tactile sense.

    INDIRECT AIM

    To aid the child’s fine motor by cultivating a lightness of touch.
    To prepare the child for writing.
    Concentration
    Discrimination and judgement

    PRESENTATION 1

    Individual exercise done at a table.

    1. The child should wash his fingers or sensitise his fingers first.
    2. Place the Touch Fabrics from one set on the table feeling each one as you take them out of the box.
    3. Feel the fabrics between your fingers and thumb, rubbing them gently together as you do so.
    4. Make a pile of the 6 different cloths on the left hand side of the mat.
    5. On the right hand side of the mat, place the remaining cloths in a random arrangement.
    6. With your eyes averted or closed, select one cloth from the left-hand pile and bring it to the centre of the mat.
    7. Keep feeling the cloths on the right hand side until you find the one that matches the cloth from the left-hand side.
    8. Show great satisfaction when the correct piece of fabric has been located. Say, “these fabrics feel the same”.
    9. Isolate the matched pair at the centre of the far edge of the mat. Repeat the matching process.
    10. Once the matching process has been completed, show the child how to feel all the pairs again to verify the match.
    11. Separate the cloths into their piles again and invite the child to have a turn.

    PRESENTATION 2

    The child repeats the exercise but wears a blindfold.

    PRESENTATION 3

    If the child is interested, give a three period lesson on the various cloths in the fabric box.
    Use only three fabrics at a time.

    CONTROL OF ERROR

    Each has a different look, colour, and texture.

  • Montessori Touch Boards Presentation

    Montessori Lesson

    MATERIALS

    Touch Board 1 – there are two sections, one rough and one smooth
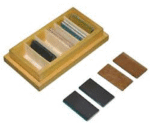
    Touch Board 2 – there are 5 strips of the same texture sandpaper alternating along the length of the board with 4 smooth varnished areas.
    Touch Board 3 – there are 4 different textures, from slightly rough sandpaper to very rough sandpaper.

    DIRECT AIM

    To help awaken the child’s tactile perceptual skills.

    INDIRECT AIM

    To aid the child’s fine motor by cultivating a lightness of touch.
    To prepare the child for writing.

    AGE

    2.5 years approx.

    PRESENTATION

    Individual exercise done at a table.

    1. The child should wash his fingers or sensitise his fingers first.
    2. Present touch board 1 first.
    3. Position the board so that the smooth side is on the left-hand side.
    4. With eyes averted, lightly brush the tips of the fingers of one hand over the smooth surface, pulling your hand towards yourself from far to near. Say “smooth”.
    5. Do the same with the “Rough” section. Invite the child to feel the different textures.
    6. Do a three period lesson with the words: smooth and rough.
    7. Present Touch Board 2 next.
    8. Stroke the board in the same way alternatively saying “ rough, smooth, rough, smooth”
    9. Let the child feel this board.
    10. Again, do a three period lesson with rough and smooth.
    11. Present Touch Board 3 next.
    12. The smoothest sandpaper strip is on the left-hand side with the roughest on the right hand side. Brush your fingertips over the first strip from top to bottom and say “rough”.
    13. As you feel each strip of sandpaper so you will say “rougher, rougher, roughest”
    14. Use a three period lessonto reinforce the comparative and superlatives remembering to always follow the same sequence.

    CONTROL OF ERROR

    If his fingers go off the sandpaper, he will feel the contrast.

  • The Montessori Bells – additional exercises

    Montessori Lesson

    AGE

    4 years onwards

    MATERIALS

    Set 1

    A series of bells representing the whole tones and semi- tones of one octave from middle c. the bells are on black and white bases and correspond to the black and white notes on a piano.

    Set 2

    A second series of bells identical in sound to the above set but all on plain wooden bases and a wooden board marked into black and white spaces which are wide enough to hold one bell.
    A wooden striker
    A damper

    DIRECT AIM

    To develop the child’s discrimination of pitch.

    INDIRECT AIM

    To develop the child’s perception of tones
    To prepare the child for music.

    PRESENTATION

    High and low

    1. High and low are taught by means of the three period lesson. Select three bells from the diatonic scale e.g. Middle C and A – and bring them to the front of the mat isolating them from the others. Strike middle C, listen. Sing “this is low” then mute the bell. Strike A and listen. Sing “this is high” then mute the bell. Repeat.
    2. In the second period sing the “strike high” and “strike low” notes and encourage the child to answer by singing on the notes.
    3. In the third period, ask, “what is this”?

    Comparitives and superlatives

    1. Select middle c and the three highest notes a, b, and c – and bring them down to the front of the stand to isolate them from the others.
    2. Strike middle c, sing “this is low”, and mute it.
    3. Strike a and sing “this is “high” and mute it.
    4. Strike b and sing “this is higher” and mute the bell.
    5. Strike c, sing “this is the highest”, and mute the bell.
    6. Continue in the usual manner with the second and third period.

    Names and notes of the diatonic scale

    1. Play the diatonic scale and tell the child that the notes have names.
    2. Sing the names as you strike the bells again from middle c, to c.
    3. Then select three bells e.g. Middle c, e and b.
    4. Bring them down to the front of the stand to isolate them from the others.
    5. Strike middle c, listen and sing in tune “ this is c”
    6. Invite the child to do the same.
    7. Then do likewise with e and b giving the child a turn.
    8. Continue as for the 3 period lesson.
    9. Teach all the notes in this way.
    10. Before each lesson, review the ones already learnt.

    Names of sharps and flats

    1. Play up and down the chromatic scale and sing la, la ,la,la.
    2. Decide on a bell e.g. Middle c and d.
    3. Strike middle c and sing in tune la – mute it.
    4. Strike c # and sing in tune la – mute it.
    5. Explain to the child that the notes are very similar with only a semi-tone difference.
    6. Ask him to listen carefully and proceed to sing them again.
    7. Play c # (sharp) again and tell the child that this is called c sharp. It is just higher than c.
    8. Invite the child to have a turn. Strike d and sing “la”…-mute it.
    9. Explain to the child that this note can also be called d flat.
    10. Ask to child to listen carefully, strike, and sing d and b flat.
    11. Continue as for a normal three period lesson. The other sharps and flats are similarly introduced.

    CONTROL OF ERROR

    The child realises when working with the chromatic scale that when a black bell is to the right of a white bell it is called a sharp relative to the white bell. When a black bell is to the left of a white bell it is called a flat relative to that bell – although the child will be working with the brown bells in front of the bells mentioned. It is essential that the control set of Bells are always in the correct sequence.

  • The Montessori Bells Presentation

    Montessori Lesson

    AGE

    3.5 years onwards

    MATERIALS

    Set 1

    A series of bells representing the whole tones and semi- tones of one octave from middle c. the bells are on black and white bases and correspond to the black and white notes on a piano.

    Set 2

    A second series of bells identical in sound to the above set but all on plain wooden bases and a wooden board marked into black and white spaces which are wide enough to hold one bell.
    A wooden striker
    A damper

    DIRECT AIM

    To develop the child’s discrimination of pitch.

    INDIRECT AIM

    To develop the child’s perception of tones
    To prepare the child for music.

    Introductory exercise

    Demonstrate how to play the bells up and down the scale. The child can then select a single bell and isolates it from the others at the front of the stand or takes it to the table. He then strikes and mutes the bell alternately, or he strikes the bell and allows the note to die away. The child is encouraged to sing the note.

    PRESENTATION 1

    1. Name the bells and show the child how to carry them. The bell should be carried in an upright position only, with one hand gripping the stem and the other hand beneath the base.
    2. Tell the child that we are going to pair the diatonic scale.
    3. Set 1 is placed on the wooden board in the correct order. The Montessori Directress shows the child how to strike the bells with the hammer provided.
    4. Select three white and three corresponding brown bells on the board.
    5. The selected three brown bells should contrast in tone (low C, F and B for e.g.) Place them together, in a mixed up order, in the centre of the space on the table in front of the board.
    6. Take up the striker and strike one of the white bells (diatonic scale) and listen carefully to the sound. Then strike one of the brown bells and if it does not match move it to the far right hand side of the table.
    7. Strike the white bell gain, and try a second brown bell. Repeat until you find a match. Invite the child to strike each bell of the matched pair.
    8. PRESENTATION 2

      The child must distinguish differences and grade the bells. Using set 2, the bells are arranged randomly on the table from left to right. The child strikes one bell at a time. When the lowest bell is heard, he places it to the left of the mat and keeps on listening for the next highest bell. The highest bell will then be on the right hand side of the mat.

      PRESENTATION 3

      Another day, repeat the presentation with three new pairs of contrasting bells.As you introduce three new bells each day, re-use the pair that you used before. ( 1 known and 2 unknown)

      PRESENTATION 4

      Another day, do the presentation with all eight brown bells mixed up on the front edge of the table.

      PRESENTATION 5

      Give a three period lesson on the comparatives and superlatives of “high” and “low” or “highest” and “lowest” and so on.

      CONTROL OF ERROR

      For ex. 2, the child can check to see if he has graded the bells correctly by comparing the order of the bells of set 1. These are set out on the board in the correct order.

  • Montessori Sound Cylinders Lesson Activity

    Montessori Lesson

    AGE

    3 years approx.

    MATERIALS

    Two wooden boxes each containing 6 cylinders, which are filled with different objects so that when shaken they have a different sound. One box has a blue lid and blue topped cylinders. The red topped box has red topped cylinders.

    DIRECT AIM

    To help awaken and refine the child’s auditory sense.

    INDIRECT AIM

    To aid the child’s auditory memory.
    To aid the child’s auditory perception.
    To give the child experience in matching.
    Concentration
    Discrimination and judgement

    PRESENTATION

    1. Individual exercise done at a table. Bring both the boxes to the table. Remove the lid from the red set and place it underneath the box.
    2. Show the child how to hold the cylinder by its middle between the thumb and forefinger of one hand. Hold the cylinder by the right ear and give it two sharp shakes downward, listening intently to the sound it makes. Then hold it a few centimeters from the other ear and listen to it in the same way fixing the sound into your memory.
    3. Replace the cylinder on the mat. Listen to all the cylinders in this way and invite the child to listen.
    4. Arrange these red cylinders randomly in a vertical line on the left-hand side of the mat. Now place the blue lid under its box, remove the blue cylinders and place them in a group on the right hand side. Tell the child that the blue and red cylinders sound exactly the same. Proceed to match the cylinders.
    5. Take one of the red cylinders and bring it to the front of the mat. Listen to the cylinder as before. Take a blue cylinder from the line and listen. If the two cylinders do not match return the blue cylinder to the box to isolate it. Listen to the next blue cylinder until a match is found. If a match is found say “these two sound the same” and place the matched pair in the centre of the far edge of the mat. Allow the child to listen to the match.
    6. When all 6 pairs have been matched, shake each matched pair in turn, one cylinder at a time, from far to near, and invite the child to do the same.
    7. Separate the 6 pairs as before and offer the child a turn.

    PRESENTATION 2

    1. Take out all the cylinders from one of the sets and tell the child that you are going to grade the cylinders.
    2. Arrange the red cylinders in a random row from left to right, at the centre of the mat. Shake each cylinder in the row, as many times as is needed to determine which is the loudest. If, necessary keep repeating and compare, two or three that are close in sound. Remove the loudest cylinder from the row and place it in front of the empty red box near the left-hand side of the mat.
    3. Of the remaining cylinders again determine which is the loudest and place the next loudest cylinder just in front of the first loudest along the left hand edge of the mat.
    4. Continue until all 6 cylinders have been graded.
    5. Either, let the child listen to the graded set or else take out the blue set and let the child grade these in the same way.
    6. When this done the child can check his graded set against your set by shaking each corresponding pair in turn.
    7. If the child shows great difficulty grading, on another day give the same presentation but take out only three cylinders from each colour.

    PRESENTATION 3

    Give a three period lesson on the terms: loud and soft.
    Give a three period lesson on the comparatives and superlatives of loud and soft such as loud, louder, loudest and the same with the soft, louder, loudest set or soft and softer.

    Extension / game

    Place the cylinders from one box on a tablemat and those from the other box on a table mat some considerable distance away. At the first mat, isolate one cylinder for the child to listen to and ask the child to find the matching cylinder on the distant mat and to bring it back to verify the match.

    CONTROL OF ERROR

    Each pair of cylinders sounds the same.
    Each pair of cylinders have a matching symbol underneath them.

  • Montessori Constructive triangles Box 5 – experimental box

    Montessori Montessori Constructive triangles Box 5 – experimental box Lesson

    MATERIALS

    Box 5 is a triangular box which contains 8 blue triangles:
    2 small equilateral triangles.
    1 small obtuse angle scalene triangle.
    2 large right angle isosceles triangles.
    1 small right angle scalene triangle.
    2 medium right angle scalene triangles.

    DIRECT AIM

    To give the child the opportunity to experiment with various geometric shapes.

    INDIRECT AIM

    To show that all plane, flat, rectilinear figures are composed of triangles.
    To indirectly prepare the child for later work in Maths and Geometry.

    AGE

    4 to 4.5 years approx.

    PRESENTATION 1

    [DAP hasAccessTo=”11,21,22,23,319″ errMsgTemplate=”LONG”]
    Individual exercise done at a table or on a floor mat.

    1. Select a triangle and show the child how to find the match by placing the triangles on top of its match.
    2. Holding one triangle with the left hand, slide the other triangle around it with the right hand.
    3. Make a shape and leave it for a while so that the child can see it.
    4. Slide the triangles back to its original shape.
    5. There are no black lines on the triangles to guide the child.
    6. This is the only box with no “control of error” – it is solely for experimental purposes.
    7. Also, sliding the triangles to find its match is only permitted in this exercise.
    8. PRESENTATION 2

    9. Give a three period lesson on the names of the shapes.
    [/DAP]

  • Montessori Constructive triangles Box 4 Lesson Activity

    Montessori Lesson

    AGE

    4 to 4.5 years approx.

    MATERIALS

    Box 4 is a hexagonal box which contains the following 18 triangles:
    1 yellow equilateral triangle with no black lines.
    3 green equilateral triangles, two with the black lines on one side and one with black lines on two sides.
    2 red equilateral triangles with the black line on one side.
    6 red obtuse angle isosceles triangles with the black line opposite the obtuse angle
    6 grey equilateral triangles with the black lines on two sides.

    DIRECT AIM

    To give the child the opportunity to experiment with various geometric shapes.

    INDIRECT AIM

    To discover, at a sensorial level, the various ways these shapes can be divided and combined to form other shapes.
    For later work in Maths and Geometry.

    PRESENTATION 1

    [DAP hasAccessTo=”11,21,22,23,319″ errMsgTemplate=”LONG”]
    Individual exercise done at a table or on a floor mat.

    1. Take the 6 small grey equilateral triangles, construct a hexagon, keeping the non-line sides outwards. Invite the child to do the same after dismantling it for him. Put the hexagon to one side.
    2. Take the 1 yellow equilateral triangle and the three red obtuse angle triangles and make a hexagon.
    3. With the other 3 red obtuse angle triangles, allow the child to make an equilateral triangle on top of the yellow equilateral triangles, which was used to build the hexagon.
    4. Take away the yellow equilateral triangles and construct the hexagon using the 6 obtuse angle isosceles triangles.
    5. The two small equilateral triangles form a rhombus.
    6. The three small green equilateral triangles form a trapezium
    7. Look again at the grey hexagon, it divides into 2 trapeziums. Proceed to build the green trapezium on top of the grey trapezium. The grey hexagon also divides into 3 rhombi.
    8. The red hexagon will also divide into three rhombi.
    9. PRESENTATION 2

    10. Give a three period lesson on the names of the various triangles.
    [/DAP]

    CONTROL OF ERROR

    The black lines.
    Visual

  • Montessori Constructive triangles Box 3 Lesson Activity

    Montessori Lesson

    AGE

    4 o 4.5 years approx.

    MATERIALS

    Box 3 is a hexagonal box which contains the following 11 triangles:
    3 yellow obtuse angle isosceles triangles with black lines opposite the obtuse angle on the longer side.
    3 yellow obtuse angle isosceles triangles with the black line on both sides containing the obtuse angle.
    2 grey obtuse angle isosceles triangles with the black line on one of the sides containing the obtuse angle.
    2 red obtuse angle isosceles triangles with the black line opposite the obtuse angle
    1 large yellow equilateral triangle with the black lines on all the sides

    DIRECT AIM

    To give the child the opportunity to experiment with various geometric shapes.

    INDIRECT AIM

    To discover, at a sensorial level, the various ways these shapes can be divided and combined to form other shapes.
    For later work in Maths and Geometry.

    PRESENTATION 1

    [DAP hasAccessTo=”11,21,22,23,319″ errMsgTemplate=”LONG”]

    Individual exercise done at a table or on a floor mat.

    1. Take the large yellow equilateral triangle and ask the child to make a shape using the 3 isosceles triangles. He should easily make the hexagon shape, having practised with the other boxes.
    2. Take 3 more yellow isosceles triangles and make a shape with them using the black lines as guidelines. Make an equilateral triangle. This equilateral triangle is the same as the one that forms the centre of the hexagon. Prove it by building these three triangles on top of it. Now the child will know that he can use the 6 yellow isosceles triangles to form a hexagon.
    3. The two red obtuse angle isosceles triangles form a rhombus.
    4. The two grey obtuse angle isosceles triangles form a parallelogram.
    5. Show the child that the hexagon built with the 6 yellow isosceles triangles can be split into 3 rhombi.
    6. PRESENTATION 2

    7. Give a three period lesson on the names of the various triangles.
    [/DAP]

    CONTROL OF ERROR

    The black lines.
    Visual

  • Montessori Constructive triangles Box 2 Lesson Activity

    Montessori Lesson

    AGE

    4 to 4.5 years approx.

    MATERIALS

    Box 2 is a rectangular box which contains the following 14 triangles:
    2 yellow right angle triangles with black lines on the shorter side containing the right angle.
    2 green right angle scalene triangles with a black line on the longer side containing the right angle.
    2 yellow right angle isosceles triangles with the black line on one of the sides containing the right angle.
    2 yellow equilateral triangles with the black line on one side.
    2 grey right angle scalene triangles with the black line opposite the right angle,
    2 green right angle isosceles triangles with the black line opposite the right angle.
    1 red right angle scalene triangle with the black line on the longer side containing the right angle.
    1 red obtuse angle scalene triangles with the black line opposite the obtuse angle.

    DIRECT AIM

    To give the child the opportunity to experiment with various geometric shapes.

    INDIRECT AIM

    To discover, at a sensorial level, the various ways these shapes can be divided and combined to form other shapes.
    For later work in Maths and Geometry.

    PRESENTATION 1

    [DAP hasAccessTo=”11,21,22,23,319″ errMsgTemplate=”LONG”]
    Individual exercise done at a table or on a floor mat.

    1. Remove the triangles from the box, one at a time. Place the box in the corner of the table with the lid underneath the box. Select one of the triangles. Hold it flat on the table with your left hand.
    2. Trace along the black lines with the middle and index fingers. Look around for the matching triangle. Once found, trace along the black lines again, using the middle and index fingers.
    3. Fit the two triangles together by sliding them together on the mat so that their black lines match and so that a new shape is formed.
    4. Place this shape to one side and continue in this way with the remaining triangles.
    5. Invite the child to try the exercise.
    6. When finished, show the child how to return the triangles to the box carefully.
    7. PRESENTATION 2

    8. Give a three period lesson on the names of the various triangles.
    [/DAP]

    CONTROL OF ERROR

    The black lines.
    Visual

  • Montessori Constructive triangles Box 1 Lesson Activity

    Montessori Lesson

    AGE

    4 to 4.5 years approx.

    MATERIALS

    Box 1 is a triangular box which contains the following 10 triangles:
    4 red equilateral triangles with a black line on one of the 3 sides while the 4th triangle has black lines on all 3 sides.
    3 yellow obtuse angle isosceles triangles with a black line on both sides of the obtuse triangles.
    2 green right angle scalene triangles with black lines on the longer side of the right angle.
    1 large grey equilateral triangles with no black lines.

    DIRECT AIM

    To give the child the opportunity to experiment with various geometric shapes.

    INDIRECT AIM

    To discover, at a sensorial level, the various ways these shapes can be divided and combined to form other shapes.
    For later work in Maths and Geometry.

    PRESENTATION 1

    Individual exercise done at a table or on a floor mat.

    1. Remove the triangles from the box, one at a time. Bring the 2 green triangles closer together and feel along each of the triangle’s black lines with the middle and index fingers. Fit the two triangles together by sliding them together on the mat so that their black lines match together.
    2. Continue in this way with the yellow, then the red triangles.
    3. Check that the triangles are correct by placing the grey triangle on top of each new triangle and verifying the match.
    4. Show the child how to return the triangles back in the box in order: red, yellow, green, and grey.
    5. PRESENTATION 2

    6. Give a three period lesson on the apex, base, bisector, median, align

    CONTROL OF ERROR

    The black line and the large grey triangle.
    Visual

  • Montessori Knobless Cylinders Lesson Activity

    Montessori Lesson

    Montessori Knobless Cylinders Lesson Presentation

    MATERIALS:

    Four sets of 10 cylinders. Each set is a different colour and has a corresponding colour lid. Yellow cylinders vary in height and diameter. Green cylinders vary in height and diameter. Red cylinders vary in diameter. Blue cylinders vary in diameter.

    OBJECTIVES:

    • To develop the child’s visual perception of dimension.
    • To develop the child’s co-ordination of movement.
    • To provide experiences of seriation.
    • To give the child basic language important in Maths.
    • Fine motor movements and co-ordination
    • Concentration
    • Hand eye co-ordination

    CONTROL OF ERROR:

    Visual – the child can see irregularities in the seriation.

    If the tower topples.

    AGE:

    2 ½ – 3 years approx.

    PRESENTATION:

    Individual exercise done on a floor mat or on a table.

    Place a mat on the working space. Select the yellow box first. Show the child how to carry the box using two hands cupped around the box. Remove the cylinders one by one grasping them over the top with your dominant hand. Place the box neatly to the side and the top of the mat.

    Show the child how to grade the cylinders from biggest to smallest in a horizontal line.

    Exercise 1:

    The child grades the cylinders.

    PRESENTATION 2

    Show the child how to build a tower with the cylinders starting with the largest cylinders first. If the mat has a thick, uneven pile, you may use the lid of the box as a base.

    Exercise 2:

    The child builds the tower.

    Exercise 3:

    The child uses the four sets of cylinders together to discover different properties such as similarities and differences in dimensions between the cylinders.

  • Montessori Colour Wheel Lesson Activity

    Montessori Lesson

    Montessori Colour Wheel Lesson Presentation

    MATERIALS:

    Colour box 3 : A box divided into 9 sections,containing seven shades of nine different colours:

    Blue, red, yellow, purple, orange, green, pink, black to white, brown

    Round plate for the centre

    OBJECTIVES:

    • To refine the child’s perception of colour.
    • To develop and refine visual discrimination
    • Concentration
    • To develop fine motor co-ordination
    • To develop the pincer grip
    • To teach the different colour names and enlarge his vocabulary.

    CONTROL OF ERROR:

    Visual- the child can see the differences.

    The Montessori Directress.

    AGE:

    4 years plus

    PRESENTATION:

    1. Individual exercise done on a neutral coloured floor mat.
    2. Remove one set of colours from the box and place the tablets vertically on the mat from darkest to lightest. Remind the child how we grade the colours.
    3. Remove all the different hues of each colour.
    4. Place a round object in the middle of a second mat, and help the child find the darkest shade of each colour. Place these dark tablets around the circle.
    5. The white edges of all the tablets should be touching.
    6. The child then selects the darkest tablet, one at a time, of each hue and each tablet is placed under its corresponding row. In this way, a star – shaped pattern is created, decreasing in intensity from the centre outwards.
  • Montessori Colour box 3 Lesson Activity

    Montessori Lesson

    Montessori Colour box 3 Lesson Presentation

    MATERIALS:

    A box divided into 9 sections,containing seven shades of nine different colours:

    Blue, red, yellow, purple, orange, green, pink, black to white, brown

    Neutral coloured work mat.

    OBJECTIVES:

    • To refine the child’s perception of colour.
    • To develop visual discrimination
    • Concentration
    • To develop fine motor co-ordination
    • To develop the pincer grip
    • To teach the different colour names and enlarge his vocabulary.

    CONTROL OF ERROR:

    Visual- the child can see the differences.

    The Montessori Directress.

    AGE:

    4 years plus

    PRESENTATION:
    [DAP hasAccessTo=”11,21,22,23″ errMsgTemplate=”LONG”]

    Individual exercise done on a neutral coloured tablemat. Show the child how to carry the colour box to the work mat by supporting the bottom of the box with the fingers cupped under the box and the thumb on the top of the box.

    Remove the lid and place it under the box at the top right hand corner of the mat.

    A.

    Firstly, take three contrasting shades from the selected colour. Show the child how to grade the tablets from dark to light or vice versa. Place the tablets on the table so that the frames are on the top and bottom of the tablets.

    B.

    As soon as the child can grade these three tablets, the Montessori Directress introduces all seven shades to the child. Place the tablets randomly on the table and proceed to grade them from darkest to lightest. Invite the child to have a turn.

    C.

    The child may then grade any of the other nine colours but only one at a time until he has completed the box.

    D.

    The child may use 2, 3,4 or all nine shades together.

    [/DAP]

  • Montessori Colour box 2 Lesson Activity

    Montessori Lesson

    Montessori Colour box 2 Lesson Presentation

    MATERIALS:

    A box containing 22 tablets, of which there are two of the following:

    Blue, red, yellow. – primary colours

    Purple, orange, green – secondary colours

    Pink, grey, brown – tertiary colours

    White and black

    Neutral coloured work mat.

    OBJECTIVES:

    • To develop the child’s visual perception of colour.
    • To develop the child’s co-ordination of movement.
    • To develop visual discrimination
    • To give the child experience in matching.
    • Concentration
    • To develop fine motor co-ordination
    • To develop the pincer grip
    • To teach the different colour names

    CONTROL OF ERROR:

    Visual- the child can see the differences.

    The Montessori Directress .

    AGE:

    3 years plus

    PRESENTATION:

    1. Individual exercise done on a neutral coloured tablemat. Show the child how to carry the colour box to the work mat by supporting the bottom of the box with the fingers cupped under the box and the thumb on the top of the box.
    2. Remove the lid and place it under the box at the top right hand corner of the mat.
    3. Invite the child to select the primary colours already done in colour box 1, saying “would you like to pick out the colours that we have already done?” or “ would you like to get the blue, red and yellow colour tablet?”
    4. Introduce the next three secondary colours by picking them out and getting the child to match them to their pairs just as they did in the first exercise.
    5. Do not overwhelm the child by introducing too many new colours at once but rather continue on another day.
    6. When the child can successfully match the secondary colours you may then introduce the names with a three period lesson.
    7. Remember to always use one known name and two unknown names. The names should not sound alike nor should the colours look too alike.

    Language:

    Using the three period lesson the Montessori Directress tells the children the appropriate colour names after he has successfully paired the tablets. He works firstly with the Primary colours, then the secondary colours and finally with the remaining colours.

  • Montessori Color box 1 Lesson Activity

    Montessori Lesson

    Montessori Colour box 1 Lesson Presentation

    MATERIALS:

    A box containing six tablets, of which two are blue, two are red and two are yellow (the primary colours).

    Neutral coloured work mat.

    OBJECTIVES:

    • To develop the child’s visual perception of colour.
    • To develop the child’s co-ordination of movement.
    • To develop visual discrimination
    • To give the child experience in matching.
    • Concentration
    • To develop fine motor co-ordination
    • To develop the pincer grip

    CONTROL OF ERROR:

    Visual- the child can see the differences.

    AGE:

    2 ½ years approx.

    PRESENTATION:

    1. Individual exercise done on a neutral coloured table mat.Show the child how to carry the colour box to the work mat by supporting the bottom of the box with the fingers cupped under the box and the thumb on the top of the box.
    2. Remove the lid and place it under the box at the top right hand corner of the mat.
    3. Remove the tablets one by one showing the child how to handle the tablets only by the frames. Handle the tablets between the thumb, index and middle finger and place the tablets randomly on the table. The Montessori Directress deliberately picks up one tablet and places it vertically in front of the child so that the frame of the tablet is at the top and bottom of the tablet.
    4. Ask the child to find a tablet that looks the same as the one that has just been placed. Show the child how to place this one beside the other tablet. Continue with the child in this way until all three pairs have been matched.

    Exercise1 :

    The child pairs the tablets as he has been shown.

    Introducing Language:

    Using the three period lesson the Montessori Directress tells the children the appropriate colour names after he has successfully paired the tablets.

  • Montessori Broad Stair Lesson Activity

    Montessori Lesson

    AGE

    2.5 – 3 years approx.

    MATERIALS:

    10 brown wooden Prisms which are all the same length but whose height and breadth increase by one centimetre each time.
    Work mat.

    DIRECT AIM

    To develop the child’s visual perception of dimension.

    INDIRECT AIM

    To develop the child’s co-ordination of movement.
    To provide experiences of seriation by showing the relationships between prisms.
    To give the child basic language important in Maths.
    Gross motor movements
    Concentration

    PRESENTATION

    1. Individual exercise done on a floor mat.
    2. Place a floor mat on the working space.
    3. Show the child how to carry each prism to the mat by supporting the bottom of the prism with the left hand held just below the prism and with the right hand held stretched over the breadth of each prism. This will give the child a muscular impression of size.
    4. The prisms are randomly placed on the mat. Show the child how to build the stair starting with the largest prism first. Align the long side of the first prism with the top end of the mat and ensure that the prisms are built using the length of the mat as a guide.
    5. Each prism is placed a little distance from the previous prism and then using both hands, push up each prism to meet the previous prism. Every so often run your hands along the sides of the built prisms to ensure that they are all in line.
    6. Mix up the prisms gently and quietly and invite the child to build the stair.
    7. Show him how to feel that the stair has been correctly built by running his hand down the stair, but also show him how to fit the smallest prism into each successive stair.

    Should the child struggle with this exercise he can do:

    A

    The 4 or 5 smallest prisms

    B

    The 5 largest prisms

    C

    5 successive prisms from the middle

    D

    Use every other prisms

    Game 1

    The child may use the Pink Tower and Broad Stair together and discover the relationship between them. He may discover various differences and similarities.
    Give the child appropriate language as he makes his discoveries.

    CONTROL OF ERROR

    When the child feels the stair he may realise there is a prism out of sequence.

  • Montessori Pink Tower Lesson Activity

    Montessori Lesson

    AGE

    2 ½ years approx.

    MATERIALS

    10 pink wooden cubes varying in size from one cubic cm. To one cubic decimeter.
    Work mat.

    DIRECT AIM

    To develop the child’s visual perception of dimension.

    INDIRECT AIM

    To develop the child’s co-ordination of movement.
    To provide controlled experiences of seriation particularly working with the cube which is important in Maths.
    To give the child basic language important in Maths.
    To strengthen the child’s hands for writing.

    PRESENTATION

    [DAP hasAccessTo=”11,21,22,23,319″ errMsgTemplate=”LONG”]
    Individual exercise done on a floor mat.

      1. Place a floor mat on the working space.
      2. Show the child how to carry each cube to the mat by supporting the bottom of the cube with the left hand held just below the block and with the right hand held stretched over each cube.
      3. The sensation will give the child a muscular impression of size.
      4. The cubes are randomly placed on the mat. Show the child how to build the tower starting with the largest cube first.
      5. Each cube is placed centrally on the previous cube. When the tower is built, ask the child to walk around the tower with you looking at the tower from all sides.

    Exercise 1:

      1. The child builds the tower

    Exercise 2:

    1. Once the child can build the tower as in exercise 1 show the child how to build a tower which has two flat walls all the way up. Show the child how the smallest pink cube fits around every ledge of the tower.
    2. Invite the child to now build a tower in this way.

    Should the child struggle with this exercise he can do:

    A

    The 4 or 5 smallest cubes

    B

    The 5 largest cubes

    C

    5 successive cubes from the middle

    D

    Use every other cube.[/DAP]

    Game 1

    The Montessori Directress hides one of the cubes and the child says which one is missing.

    CONTROL OF ERROR

    The tower will topple.
    The child may see the irregular pattern when he walks around the tower.

  • Montessori Knobbed Cylinders Lesson Activity

    Montessori Lesson

    AGE

    2.5 years approx.

    MATERIALS


    Block A – the cylinders vary in height and dimension from short/narrow to tall/wide.
    Block B– the cylinders vary in height and diameter from tall/narrow to short/wide.
    Block C– the cylinders vary in diameter.
    Block D – the cylinders vary in height.

    DIRECT AIM

    To develop the child’s visual perception of dimension.

    INDIRECT AIM

    To develop the child’s co-ordination of movement.
    To provide controlled experiences of seriation.
    To give the child basic language important in Maths.
    To strengthen the child’s fingers for writing.

    PRESENTATION

    [DAP hasAccessTo=”11,21,22,23,319″ errMsgTemplate=”LONG”]
    Individual exercise done at a table.

      1. Bring block A from the shelf showing the child how to support the underside with the small fingers. Place the cylinder block in the front of the table leaving enough space to place the cylinders.
      2. Remove the cylinders from left to right holding the knob of each cylinder between the thumb and first two fingers. Mix the cylinders in the front as you remove them.
      3. After a short pause, return the cylinders choosing them in order of size from left to right.

    Exercise 1:

      1. The child does the exercise as presented using one block at a time until he is able to work with each block separately.

    Exercise 2:

      1. The child repeats the exercise using two blocks together and they are placed in a “V” formation. Say”angle” as you feel the inside of the blocks with the two fingers of your dominant hand. Remove the cylinders from each cylinder, holding the knob of each cylinder between the thumb and first two fingers. Mix the cylinders in the space between the angles as you remove them.
      2. After a short pause, return the cylinders in no particular order.
      3. You can also place the cylinders in a parallel formation, feel the parallel formation with your middle and index fingers, and name it: “parallel”. Remove the cylinders from each cylinder block, holding the knob of each cylinder between the thumb and first two fingers. Mix the cylinders in the space between the parallel blocks as you remove them.
      4. After a short pause, return the cylinders in no particular order.

    Exercise 3:

      1. The child repeats the exercise using three blocks together. They are placed in the shape of a triangle. Show the child how to feel the triangle.

    Exercise 4:

      1. The child repeats the exercise using four blocks together.
      2. They are placed in the form of a square. Show the child how to feel the square and then how to remove the cylinders from each cylinder block, holding the knob of each cylinder between the thumb and first two fingers. Mix the cylinders in the middle of the square.
      3. After a short pause, return the cylinders in no particular order

    Exercise 5:

    1. The child repeats the exercise using four blocks together.
    2. They are placed in the form of a rectangle. Show the child how to feel the rectangle and how to proceed as before.

    Game 1:

    The cylinders are placed on a table and the cylinder block is placed on another table some distance away. She places a flag into a hole in the cylinder block and asks the child to fetch the correct cylinder.

    Game 2

    Each child takes a cylinder and holds it behind his back.
    The block remains on the table.
    The Montessori Directress points to one of the holes and invites the children to discover who has the corresponding cylinder by feeling his hidden cylinder.

    CONTROL OF ERROR

    The cylinders will not fit snuggly into their sockets.
    The socket will be too big for the cylinder.

  • The Montessori Red Rods Lesson Activity

    Montessori LessonMontessori Red Rods Presentation
    The Montessori Red Rods, Pink Tower and Broad Stair are a sequence of materials designed to enable a young child to explore dimension.

    How to present the Montessori Broad Stair Lesson Activity
    How to present the Montessori Pink Tower Lesson Activity

    MONTESSORI RED RODS ACTIVITY:

    The Montessori Red Rods (also known as “Long Rods”) – Montessori Sensorial Lesson Activity for Ages 0 to 6

    MONTESSORI RED RODS OBJECTIVES:

    • To develop the child’s visual and muscular perception of length.
    • To develop the child’s co-ordination of movement.
    • To provide controlled experiences of seriation.
    • To give the child basic language important in Maths.
    • Co-ordination, Balance, Concentration.

    MONTESSORI RED RODS MATERIALS:

    • 10 Red Wooden Rods all the same thickness but varying in length from one decimeter to one meter.
    • Each rod increases in length by the length of the smallest rod. The pieces then stand in the same relation to one another as the natural series of the numbers 1, 2, 3, 4, 5, 6, 7, 8, 9, 10.
    • Work mat.

    [ebayfeedsforwordpress feed=”http://rest.ebay.com/epn/v1/find/item.rss?keyword=Montessori+Red+Rods&sortOrder=BestMatch&programid=1&campaignid=5336664926&toolid=10039&listingType1=All&feedType=rss&lgeo=1″ items=”2″]

    MONTESSORI RED RODS CONTROL OF ERROR:

    • The rods will not be in a stair formation and the child may feel the irregularity.
    • The child may see the irregular pattern.
    • The smallest rod fits into each successive step.

    AGE:

    2 ½ years approx.

    MONTESSORI RED RODS PRESENTATION 1:

    1. Individual exercise done on a floor mat.
    2. Place a floor mat on the working space.
    3. Show the child how to carry each rod to the mat one by one by holding each rod at the top with one hand and at the bottom with the other. This will give the child a muscular impression of length.He should hold the rods upright so that he does not bump into other children.The rods are randomly placed on the mat.
    4. Show the child how to build the rods starting with the shortest rod. Align the rod with the edge of the mat. Using your middle and index finger lightly trace along the entire length of the rod.
    5. Find the next longest rod. Bring it into position next to and above the previous rod and trace along its length again. Proceed with all the rods in this way until the stair is entirely built.
    6. Pause and admire the stair and then mix up the rods and invite the child to try.
    7. Should you see the child struggling, mix the rods up but align the mixed up rods along the edge of the mat.
    8. Once the child has successfully built the stair, show him how to fit the shortest rod into each successive stair.

    Should the child struggle with this exercise or for younger Children from Age 1 to 3 they can do:

    1. The 4 or 5 smallest rods
    2. The 5 largest rods
    3. 5 successive rods from the middle
    4. Use every other rod.
  • Montessori Thermic Tablets Lesson Activity

    ACTIVITY:

    Montessori Thermic Tablets

    MATERIALS: image
    A box divided into four sections containing two tablets each made of felt, wood, steel and slate.
    OBJECTIVES:

    To help awaken the child’s sense of time.

    To give the child a sense of the cosmic approach.

    The child is able to see the succession of days

    CONTROL OF ERROR:

    The days are torn off.

    The child sees the calendar getting “thinner” throughout the year.

    AGE: 4 – 6 years approx. [DAP isPaidUser=”Y” errMsgTemplate=”LONG”]
    PRESENTATION: Presentation 1 

    1. The Directress sits beside the child. First, she arranges the tablet into columns.
    2. The first set is placed in a column on the left side, which we shall called it Side A.
    3. The other set is placed on the right hand side, called Side B.
    4. The Directress then shows the child how to do the pairing exercise.
    5. She places her left hand on the first piece of tablet on side A and feels the temperature. [/DAP]
    6. While keeping her left hand remaining on the piece of tablet, she uses her right hand to feel the tablets on side B, one at a time to find the matching piece of tablet.
    7. The matched tablets are then placed together side by side in the middle between the two columns of tablets.
    8. The Directress continues in this manner until all the tablets are matched.


  • Montessori Thermic Bottles Lesson Activity

    ACTIVITY:

    Montessori Thermic Bottles

    MATERIALS: image
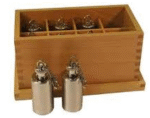
    Eight thermic bottles, these are small, chrome-plated metal bottles similar to thermos flasks which are filled with water of different temperatures immediately before use.

    Thermometer

    Bottles are prepared in pairs.

    OBJECTIVES:

    To develop a sensorial awareness of temperature.

    CONTROL OF ERROR:

    The thermometer is used to prepare the bottles, with the bottles being marked to show the variation so that the temperatures can be checked

    AGE: 4 – 6 years approx. [DAP isPaidUser=”Y” errMsgTemplate=”LONG”]
    PRESENTATION: Presentation 1 

      1. The Directress takes out one set of the thermic bottles and align them in a column on the left side of the table, which we shall call side A.
      2. The other set is then align in another column in the right side, which we shall refer to as Side B.
      3. The Directress then begins the pairing exercise.
      4. She shows how to hold one of the bottles from side A by grasping around the bottle with the left hand. [/DAP]
      5. She feels the temperature with the left hand and then using the right hand, goes through each thermic bottles on side B, trying to find the bottle that is of the same temperature.
      6. When a match is found, the pair of thermic bottles is placed in the middle between the two rows of thermic bottles.


  • Montessori Smelling Jars Lesson Activity

    ACTIVITY:

    Montessori Smelling Jars

    MATERIALS: image

    Two wooden boxes each containing six smelling bottles each

    The six, paired Smelling bottles, contain a different smelling essence, e.g. teatree, lavender water, etc.

    OBJECTIVES:

    To develop a sensorial awareness of smell.

    CONTROL OF ERROR:

    The bottom of the bottles can be coded-coded to provide a control of error. The inside of the lids are coloured in a similar way to prevent the wrong lids being replaced on the wrong bottles and so mixing up the smells.

    AGE: 3 – 6 years approx. [DAP isPaidUser=”Y” errMsgTemplate=”LONG”]
    PRESENTATION: Presentation 1 

    1. The Directress sits beside the child.
    2. Start with three sets of distinct smelling bottles first.
    3. The Directress arranged one set of the bottles in a column on the left side, call side A.
    4. The other set is then also arranged in another column on the right side, called side B.
    5. The Directress then goes to all the bottles on side A, one at a time.
    6. She takes one bottle, unscrew it and smell the contents.
    7. Then the Directress invites the child to smell it also.
    8. The Directress starts the pairing exercise. [/DAP]
    9. First, she takes a bottle from side A, smell it, passes to the child to smell and says, ‘we are looking for this smell’.
    10. Encourage the child to go through the bottles on side B to find the matching bottles.
    11. When a match is found, the pair of bottle is placed in the middle between the two rows of bottles.
    12. Continue matching the two sets of bottles.
  • Montessori Land and Water Forms Lesson Activity

    ACTIVITY: Montessori Land and Water Forms
    MATERIALS: Montessori Land Forms
    ccessive rod is bigger by 10cm.
    The rods represent fixed quantities.
    [ebayfeedsforwordpress feed=”http://rest.ebay.com/epn/v1/find/item.rss?keyword=Montessori+Land+Forms+Stackable&sortOrder=BestMatch&programid=1&campaignid=5336664926&toolid=10039&listingType1=All&feedType=rss&lgeo=1″ items=”2″]
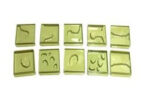
    8 (or 10) land and water forms of the following:

    island and lake

    cape and bay

    peninsula and gulf

    isthmus and strait.

    (archipelago and series of lakes)

    The land may be made from clay, which is waterproofed and sprayed, brown.

    A jug of blue-coloured water, a tray and a drying cloth.

    OBJECTIVES: To introduce the child to the many land and water forms on the earth.To give the child a concrete experience of the various forms.

    Learning the simple definitions of the various landforms.

    CONTROL OF ERROR: NA
    AGE: 4 – 6 years approx. [DAP isPaidUser=”Y” errMsgTemplate=”LONG”]
    PRESENTATION: Presentation 1

    1. Introduce one land and water form at a time. Invite the child to get some water in the jug, or to pour the coloured water into the “island” landform. Let the child explore this sensorially by feeling the water and feeling the land. Give the child a short definition, saying, “an island is a body of land entirely surrounded by water.”
    2. Let the child pour some water into the lake form. Let him feel the water and the land. Give him a brief definition that “a lake is a body of water entirely surrounded by land”.[DAP isPaidUser=”Y” errMsgTemplate=”LONG”]
    3. Do a brief three period lesson on the land and water forms without moving the trays around.
    4. Show the child how to empty the landform carefully into the jug by centering one corner over the jug.
    5. Wait for the last drop to fall and then dry the landform with the drying cloth.
    6. Invite the child to empty and dry the other landform in the same way.
    [/DAP]

    Presentation 2

    Present the cape and bay in exactly the same way. Thereafter, the peninsula and gulf, isthmus and strait, and lastly archipelago and a series of lakes.

    Extension 1

    This is a bridging exercise where the child matches the 10 forms to the land and water form cards. Lay the trays out in pairs from the top of the mat to the bottom.

    Give the child a card and let him try to find the concrete match. He places the card beside the form. Alternatively, show the child the landform and let him find the matching card. If the cards are made out of sandpaper, he may even feel the form as a control of error.

    You may want to keep mentioning the name of the land and water forms as the child manages to match them.

  • Montessori Lessons, Continent Puzzle Maps, Age 3 to 6

    MATERIALS:

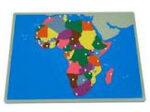
    Montessori Puzzle Map Africa

    Puzzle maps of North America, South America, Europe, Africa, Asia, and Australia.

    OBJECTIVES:

    To introduce the child to a sensorial activity related to working with the countries/ continents of the world.

    To stimulate an interest in the systematic study of the world and its peoples.

    To show that the world’s land has been divided by name and by government.

    AGE:

    3 – 6 years

    PRESENTATION 1:

    Invite the child to work with the puzzle map.

    Start with the child’s own continent. Introduce the map at a sensory level.

    Show the child how to remove the map from the stand and how to carry it.

    [DAP hasAccessTo=”11,21,22,23″ errMsgTemplate=”LONG”]

    Bring the Control Chart and place it directly below the puzzle map.

    Show the child how to lift out one piece at a time and how to place it on the Control Chart. Repeat with a few more pieces. Show the child how to replace the pieces in to the frame.

    EXERCISE 1:

    The child does the exercise as presented.

    EXERCISE 2:

    [/DAP]

    Do a three period lesson on the various names of the many countries of Africa.

    EXERCISE 3:

    Have a discussion on the continent as a whole and then on each country in that continent.

    Do the NEEDS OF MAN related to this continent or to a particular country.

    EXERCISE 4:

    For the reading child provide written labels of the different countries.

  • Montessori Sandpaper Numbers Lesson Activity

    Montessori Lesson

    MONTESSORI MATERIALS:

    Montessori Sandpaper Numbers w/ Box
    Ten sandpaper numerals 0-9 mounted on green board and presented in a wooden box.To teach the child the written symbol for numbers 1 – 10.
    The numbers from one to ten in sandpaper mounted on green card.

    MONTESSORI OBJECTIVES:

    To teach the child the numerals from one to ten.

    To prepare the child for writing.

    CONTROL OF ERROR:

    The control of error is tactile.

    If the child’s finger moves off the sandpaper the difference in texture will be easily noticed.

    AGE:

    3 ½ years approximately.

    PRESENTATION 1:

      [DAP hasAccessTo=”11,21,22,23″ errMsgTemplate=”LONG”]

    1. Begin the work cycle.
    2. Ask the child to sensitise his fingers or to wash his hands in tepid water
    3. The child sits on your non-dominant side.
    4. The child carries the numbers to the table. Show him to remove the first three carefully from the box without scraping them.
    5. Feel the first number with a light, continuous movement with the middle and index fingers of your right hand, holding the board steady with your left hand.
    6. Proceed with a three period lesson remembering to carefully isolate the numbers in the first and third period.
    7. Each time a symbol is identified in any stage, it should be felt and then named by the child.

    PRESENTATION 2:

    1. Always remember to present one known and two unknown number symbols at a time.
    2. Always revise the previous numbers and then introduce the new numbers.

    NOTE:

    In tracing the sandpaper numbers, three of the senses are involved:

    Tactile – feeling the number

    Visual – seeing the number

    Auditory – hearing the number

    The child only starts to write the number when he has had a lot of practise with the tracing.

    EXTENSION 1:

    1. Let the child trace the numbers in a container with flour or fine sand in it. (A high lipped baking tray works well)
    2. The child traces the sandpaper number and then traces the number into the mealie meal or sand, or into the air or even on the surface of the table.
    3. Show the child how to shake the container to smooth out the sand.
    4. Remember; do not correct the child.

    EXTENSION 2:

    1. Allow the child to make a RAINBOW number by tracing around a single number a few times using different coloured crayons.
    2. The child must trace the number in the correct direction, preferably not lifting his pencil unless the number calls for that.

    EXTENSION 3:

    1. The child can write in the booklet that the Montessori Directress has made for the child.
    2. The can be a cover saying, “My 5 book By…”
    3. Or “My 10 book By …”

    EXTENSION 4:

    1. Blindfold the child or place the numbers under a cloth and allow the child to feel the numbers and to try to guess which number it is that they can feel.
    2. Alternatively, the Montessori Directress can ask the child to feel for a specific number.
    [/DAP]